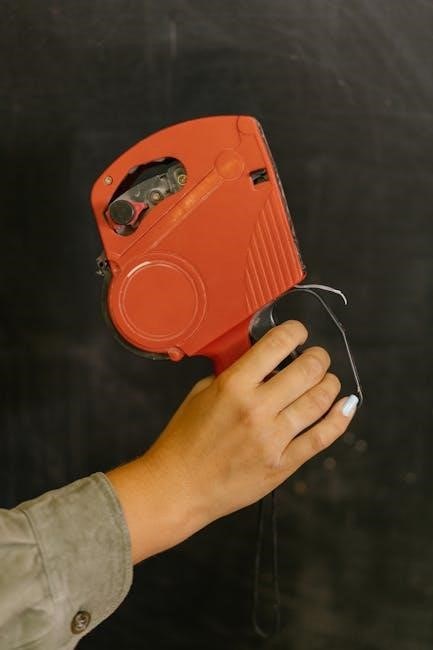
p touch label maker manual
Brother P-Touch Label Maker Manual: A Comprehensive Guide (Updated 03/24/2026)
This comprehensive guide‚ updated today (03/24/2026)‚ serves as your reliable partner for operating and maintaining your Brother P-Touch label maker effectively.
Welcome to the world of organized labeling! The Brother P-Touch label maker is a versatile tool designed to simplify a multitude of tasks‚ from home organization to professional identification. This manual will guide you through every aspect of your device‚ ensuring you harness its full potential.
Whether you’re labeling files‚ cables‚ or creating address labels‚ the P-Touch offers a convenient and efficient solution. This guide is structured to be user-friendly‚ catering to both beginners and experienced users. We’ll cover everything from initial setup and basic operation to advanced techniques and troubleshooting.
Consider this manual your partner in success‚ empowering you to create clear‚ durable‚ and professional-looking labels with ease. Let’s begin your journey to a more organized life!
Understanding P-Touch Label Maker Models
Brother offers a diverse range of P-Touch label maker models‚ each tailored to specific needs and budgets. From compact‚ handheld devices ideal for home use to more robust‚ desktop models designed for high-volume labeling in professional settings‚ there’s a P-Touch to suit every requirement.
Key differentiators between models include print resolution‚ tape width compatibility‚ connectivity options (USB‚ Bluetooth)‚ and built-in features like barcode and QR code generation. Some models feature larger displays and more intuitive interfaces for enhanced usability. Understanding these variations is crucial for selecting the perfect P-Touch for your tasks.
This guide provides general information applicable to most models‚ but always refer to your specific model’s manual for detailed instructions and features.
Key Features and Benefits of P-Touch Label Makers
Brother P-Touch label makers offer a wealth of features designed to simplify organization and enhance productivity. Key benefits include creating professional-looking‚ durable labels for a wide array of applications – from home organization and office filing to asset management and cable identification.
These devices boast diverse font styles‚ sizes‚ and symbols‚ allowing for customized labeling. Many models support barcode and QR code printing‚ streamlining inventory and tracking processes. The portability of handheld models enables on-the-go labeling‚ while computer connectivity expands design possibilities.
Ultimately‚ P-Touch label makers provide a cost-effective and efficient solution for all your labeling needs.

Setting Up Your P-Touch Label Maker
Proper setup ensures optimal performance. This section details the initial steps‚ including powering on‚ installing tape‚ and managing batteries for seamless operation.
Initial Setup and Powering On
Begin by carefully removing your new Brother P-Touch label maker from its packaging. Inspect the device for any visible damage that may have occurred during shipping. Next‚ locate the power switch – typically found on the side or back of the unit.
For models requiring batteries‚ ensure they are installed correctly‚ observing the proper polarity (+ and -) as indicated within the battery compartment. If using an AC adapter‚ connect it to a suitable power outlet and then to the label maker.
Press the power button to turn on the device. The display should illuminate‚ and you may be prompted to select your preferred language or date/time settings. Follow the on-screen instructions to complete these initial configurations. Your P-Touch is now ready for tape installation!
Installing Tape Cassettes Correctly
Proper tape cassette installation is crucial for optimal printing. Locate the tape compartment‚ usually accessed by a lever or button on the device. Open the compartment and carefully insert the tape cassette‚ ensuring the label side faces upwards.
Feed the tape through the guiding slots and rollers‚ making sure it’s properly aligned. You should hear a click or feel resistance when the cassette is securely locked into place.
Close the tape compartment cover until it latches. Perform a test print to confirm the tape is feeding correctly and the print quality is satisfactory. Incorrect installation can lead to errors or poor print results‚ so double-check your work!
Battery Installation and Replacement
To install batteries‚ locate the battery compartment‚ typically on the back or bottom of the P-Touch. Open the compartment cover‚ usually by sliding or releasing a latch. Insert the correct type and number of batteries (typically AAA or AA)‚ observing the polarity markings (+ and -) inside the compartment.
Ensure the batteries are securely seated. Close the battery compartment cover firmly. When the low battery indicator appears‚ replace all batteries simultaneously with fresh ones for continued operation. Dispose of used batteries responsibly‚ following local regulations.

Basic Operation and Label Creation
Mastering the fundamentals unlocks seamless label creation! This section details navigating the display‚ entering text‚ and customizing fonts for perfect labels.
Navigating the P-Touch Display and Buttons
Understanding your P-Touch label maker’s display and buttons is crucial for efficient operation. Most models feature an LCD screen displaying your typed text‚ formatting options‚ and preview of the final label.
Typically‚ you’ll find buttons for power‚ clear/backspace‚ shift (for accessing symbols and uppercase)‚ preview‚ print‚ and menu/mode. The menu button allows access to settings like font style‚ size‚ and tape width.
Arrow keys navigate through the menu options and edit text. Familiarize yourself with the button layout specific to your model‚ as configurations can vary. Experimenting with each button will quickly build confidence and streamline your labeling process. Refer to your model’s specific manual for detailed illustrations.
Entering Text and Numbers
Inputting text and numbers on your P-Touch is generally straightforward‚ utilizing the QWERTY-style keypad. Pressing each key displays the corresponding character on the LCD screen.
To switch between uppercase and lowercase‚ use the shift key‚ often combined with pressing the desired letter. Numbers are typically found on dedicated keys or accessed via the shift function.
The space bar creates gaps between words‚ and the clear/backspace button corrects errors. Some models offer predictive text or auto-correction features to speed up typing. Practice entering various combinations of letters and numbers to become comfortable with the keypad layout and functions.
Selecting Fonts‚ Styles‚ and Sizes
Your Brother P-Touch offers a variety of fonts‚ styles‚ and sizes to customize your labels. Access these options through the “Style” or “Font” button on the device.
Navigate through available font types – often including standard‚ outline‚ and specialty options – using the arrow keys. Styles typically include bold‚ italic‚ underline‚ and shadow effects. Adjust the font size to fit your label and readability needs.
Preview your selections on the LCD screen before printing. Remember that certain fonts and styles may consume more memory or tape. Experiment with different combinations to achieve the desired aesthetic for your labels.
Advanced Labeling Techniques
Unlock your P-Touch’s full potential with techniques like incorporating symbols‚ creating barcodes‚ and skillfully arranging multi-line text for professional labels.
Using Symbols and Frames
Enhance your labels with a diverse range of built-in symbols‚ adding visual cues and clarity to your organization. The Brother P-Touch allows easy access to common symbols‚ from basic shapes to industry-specific icons‚ directly through the device’s interface.
Furthermore‚ frames provide a decorative border around your text‚ offering a polished and professional finish. Experiment with different frame styles – solid‚ dashed‚ or patterned – to match the label’s purpose and aesthetic.
Combining symbols and frames can dramatically improve label readability and visual appeal. Consider using a symbol to highlight important information‚ enclosed within a frame for emphasis. This technique is particularly useful for safety warnings‚ inventory tags‚ or identifying specific items quickly.
Creating Barcodes and QR Codes
Expand your labeling capabilities beyond simple text with the ability to generate barcodes and QR codes directly on your Brother P-Touch. This feature is invaluable for inventory management‚ asset tracking‚ and streamlining data entry processes.
The P-Touch label maker supports various barcode symbologies‚ including Code 39‚ Code 128‚ and EAN‚ ensuring compatibility with most scanning systems. QR codes offer a convenient way to encode URLs‚ contact information‚ or other data for quick access via smartphones.
Utilizing the P-Touch Editor software simplifies barcode and QR code creation. Input your data‚ select the desired code type‚ and the software automatically generates the corresponding image for printing on your label.
Working with Multiple Lines of Text
Brother P-Touch label makers excel at creating labels with complex layouts‚ including multiple lines of text. This is crucial for detailed labeling needs‚ such as address labels‚ product descriptions‚ or instructions; The intuitive interface allows for easy line breaks and text alignment.
To add a new line‚ simply press the “Enter” or “Line Feed” button on your P-Touch. Experiment with different font sizes and styles for each line to enhance readability and visual appeal. The P-Touch Editor software provides even greater control‚ allowing you to precisely adjust line spacing and text positioning.
Properly formatted multi-line labels improve clarity and organization‚ making your labeling efforts more effective.

Tape Cassette Types and Compatibility
Understanding the diverse range of Brother P-Touch tapes and ensuring compatibility with your specific model is vital for optimal label quality and durability.
Understanding Different Tape Widths
Brother P-Touch label makers accommodate a variety of tape widths‚ each suited for different labeling applications. Common widths include 3.5mm‚ 6mm‚ 9mm‚ 12mm‚ 18mm‚ 24mm‚ and 36mm.
Narrower tapes (3.5mm & 6mm) are ideal for small items‚ pricing‚ or detailed organization where space is limited. The 9mm and 12mm widths offer a balance between visibility and compactness‚ perfect for general-purpose labeling. Wider tapes (18mm‚ 24mm‚ & 36mm) excel at creating prominent labels for folders‚ shelves‚ or larger items requiring high visibility.
Selecting the appropriate width ensures your labels are both legible and aesthetically pleasing‚ maximizing the impact of your organization efforts.
Choosing the Right Tape Material (Laminated‚ Non-Laminated‚ etc.)
Brother P-Touch offers diverse tape materials to suit various environments and durability needs. Non-laminated tapes are cost-effective for indoor‚ short-term labeling‚ like organizing boxes.
Laminated tapes provide superior resistance to water‚ chemicals‚ abrasion‚ and fading‚ making them ideal for outdoor use or harsh conditions. Specialty tapes include strong adhesive options for textured surfaces‚ and flexible tapes for wrapping cables.
Consider the label’s intended location and exposure when selecting a material. For example‚ laminated tapes are crucial for items frequently handled or exposed to the elements‚ ensuring long-lasting legibility.
Compatibility Charts for Specific P-Touch Models
Ensuring tape cassette compatibility is vital for optimal P-Touch performance. Brother provides detailed charts outlining which tape widths and types work with each label maker model.
These charts‚ available on the Brother Support website‚ prevent errors and ensure crisp‚ clear prints. Using incompatible tapes can damage the print head or result in poor adhesion. Always refer to the chart before purchasing new cassettes.
Model-specific compatibility also extends to barcode and QR code symbologies. Verify your P-Touch model supports the desired code type for accurate scanning and data representation.

Troubleshooting Common Issues
Encountering problems? This section provides solutions for frequent issues like “Tape Error” messages‚ printing failures‚ and unresponsive keypads‚ ensuring smooth operation.
“Tape Error” Messages and Solutions
A “Tape Error” message typically indicates the label maker isn’t detecting a properly installed tape cassette‚ or that the tape is jammed or nearing its end. First‚ power off the device and carefully remove‚ then re-insert the tape cassette‚ ensuring it clicks securely into place.
Check for any visible obstructions or torn tape within the cassette compartment. If the tape is simply nearing its end‚ replace it with a fresh cassette. For persistent errors‚ gently clean the tape guides with a soft‚ dry cloth.
Avoid using non-Brother branded tapes‚ as compatibility issues can trigger false error messages. If the problem persists after these steps‚ consult the Brother support website for model-specific troubleshooting guidance.
Printer Not Printing – Diagnosis and Fixes
If your P-Touch isn’t printing‚ begin by verifying sufficient battery power or a secure AC adapter connection. Next‚ confirm a tape cassette is correctly installed and contains tape. Inspect the print head for debris; gently clean it with a dry cotton swab.
Test the print quality using the built-in test print function‚ accessible through the device’s menu. If the test print fails‚ the print head may be damaged‚ requiring professional repair. Ensure you’re using compatible Brother tape; third-party tapes can cause printing issues.
Finally‚ check for firmware updates on the Brother support website‚ as outdated firmware can sometimes cause printing malfunctions.
Keypad Not Responding – Troubleshooting Steps
If the keypad on your Brother P-Touch becomes unresponsive‚ the first step is to replace the batteries with fresh ones‚ even if the display still illuminates. Low battery power can cause erratic keypad behavior; A simple reset can often resolve the issue; locate the reset button (consult your model’s specific manual).
Try powering the device off and on again. If the problem persists‚ carefully inspect the keypad for any visible dirt or debris that might be obstructing the buttons. Gently clean the surface with a soft‚ dry cloth.
If none of these steps work‚ contact Brother Support for further assistance.

Maintaining Your P-Touch Label Maker
Regular cleaning of the print head‚ proper tape storage‚ and mindful battery usage are crucial for extending the life and performance of your device.
Cleaning the Print Head
Maintaining a clean print head is paramount for optimal label quality. Over time‚ adhesive residue and dust can accumulate‚ leading to faded or incomplete prints. Brother recommends cleaning the print head after every tape roll change‚ or approximately every five hundred labels.
To clean‚ power off your P-Touch. Open the tape compartment and locate the print head. Use a dry‚ lint-free cloth or a cotton swab lightly dampened with isopropyl alcohol to gently wipe the print head surface. Avoid excessive pressure or abrasive materials‚ as these can damage the delicate heating elements.
Ensure the print head is completely dry before installing a new tape cassette and resuming operation. Regular cleaning prevents build-up‚ ensuring consistently crisp and clear labels for all your organizational needs. A clean print head equals a reliable labeling experience!
Proper Storage of Tape Cassettes
Correct storage of your Brother P-Touch tape cassettes is crucial for maintaining their adhesive quality and extending their lifespan. Exposure to direct sunlight‚ extreme temperatures‚ and humidity can degrade the adhesive and cause the tape to become brittle or lose its stickiness.
Brother recommends storing unused tape cassettes in a cool‚ dry‚ and dark location. Avoid storing them near heat sources or in areas prone to moisture. Original packaging is ideal‚ but a sealed plastic bag or container will also provide adequate protection.
Properly stored cassettes will ensure consistent performance and prevent wasted materials. Following these simple guidelines will help you get the most out of your P-Touch labeling system and maintain professional-looking results.
Extending Battery Life
Maximizing battery life in your Brother P-Touch label maker ensures uninterrupted labeling and reduces the frequency of replacements. Several factors influence battery consumption‚ including display brightness‚ print speed‚ and usage frequency.
To conserve power‚ consider lowering the display brightness in the settings menu. Utilizing the auto power-off feature‚ which automatically shuts down the device after a period of inactivity‚ is also highly recommended. Avoid excessive printing of test labels and limit prolonged display viewing.
Using rechargeable batteries is a cost-effective and environmentally friendly option. When storing the device for extended periods‚ remove the batteries to prevent potential leakage and corrosion.

Software and Computer Connectivity
Unlock advanced labeling capabilities by connecting your P-Touch to a computer using the P-Touch Editor software and a USB connection.
Using P-Touch Editor Software (Overview)
The Brother P-Touch Editor software dramatically expands your labeling possibilities beyond the capabilities of the device’s built-in interface. This powerful program‚ available for both Windows and macOS‚ allows for intricate label designs‚ incorporating graphics‚ logos‚ and a wider range of fonts and styles.
Users can easily import data from spreadsheets (like Excel) for mail merges‚ creating multiple labels with unique information quickly. The software provides templates for common labeling tasks‚ streamlining the process for beginners. Advanced users will appreciate the customization options‚ including precise control over text alignment‚ spacing‚ and barcode generation.
Furthermore‚ the P-Touch Editor facilitates previewing your label designs before printing‚ ensuring accuracy and minimizing wasted tape. Regular software updates from Brother add new features and improve compatibility with the latest operating systems and P-Touch models.
Connecting to a Computer via USB
Establishing a USB connection between your Brother P-Touch label maker and your computer unlocks advanced features and software utilization. Typically‚ you’ll need a standard USB-A to USB-B cable (often included with your device‚ but sometimes sold separately).
First‚ ensure your label maker is powered off before connecting. Plug the USB-B end into the port on the label maker and the USB-A end into a free port on your computer. Power on the label maker; your computer should automatically detect it as a new device.
You may be prompted to install drivers – if so‚ follow the on-screen instructions or download the latest drivers from the Brother support website. Once connected‚ you can utilize the P-Touch Editor software to create and print labels directly from your computer.
Printing Labels Directly from Your Computer
Once your Brother P-Touch label maker is connected to your computer via USB‚ you can leverage the P-Touch Editor software for seamless label creation and printing. Open the software and design your label using the available tools – text‚ symbols‚ barcodes‚ and more.
Ensure the correct label size and type are selected within the software settings to match the tape cassette installed in your device; Preview your label design before printing to confirm accuracy. When ready‚ click the “Print” button.
The software will send the label data to your P-Touch‚ which will then print the label. You can adjust print settings like density and speed within the software for optimal results.
Specific Model Manuals & Resources
Access dedicated resources‚ including model-specific manuals‚ on the official Brother Support website. Explore FAQs and connect with helpful online user communities.
Finding the Manual for Your Exact P-Touch Model
Locating the correct manual is crucial for optimal performance. Begin by visiting the official Brother Support website. There‚ you’ll find a dedicated section for downloading manuals‚ categorized by product type and model number.
To quickly pinpoint your specific P-Touch model’s manual‚ utilize the search bar and enter your model number – typically found on the device itself or its original packaging.
Brother offers manuals in various formats‚ including downloadable PDFs for convenient offline access. Ensure you select the manual corresponding to your region to guarantee accurate information. If you encounter difficulties‚ the website also provides contact information for direct support assistance.
Brother Support Website and FAQs
The official Brother Support website is a central hub for all your P-Touch label maker needs. It provides extensive resources‚ including troubleshooting guides‚ downloadable drivers‚ and the latest firmware updates to ensure optimal device functionality.
A comprehensive Frequently Asked Questions (FAQ) section addresses common issues and provides step-by-step solutions. You can browse FAQs by category or use the search function to find answers to specific questions quickly.
Beyond FAQs‚ the website offers video tutorials demonstrating various features and techniques. Direct contact options‚ such as live chat and phone support‚ are also available for personalized assistance when needed.
Online Forums and User Communities
Numerous online forums and user communities dedicated to Brother P-Touch label makers offer a wealth of knowledge and support. These platforms allow users to connect‚ share experiences‚ and troubleshoot issues collaboratively.
You can find solutions to complex problems‚ discover advanced labeling techniques‚ and learn about compatible tape options from fellow enthusiasts. Many forums feature dedicated sections for specific P-Touch models‚ ensuring relevant advice.
Active communities often host discussions on software updates‚ printer maintenance‚ and creative labeling projects. Participating in these forums provides a valuable opportunity to expand your P-Touch expertise and connect with a passionate user base.